DIY Colorful Abstract Painted Tableware

A couple weeks ago, I posted a beautiful Micro-Wedding Inspiration shoot and guess what the number one question I got on Instagram was? "Who made those glass place settings?" I felt bad because I couldn't direct them to a vendor that supplied them... the truth is, I just made them! I whipped them up the day before and loved how they turned out. So in an effort to give you guys the most info possible to pull off the pretty details, I whipped up a little tutorial for you all... but I maybe took it 2 steps further haha

So, not only can you use this method for place settings... but this works on ANY kind of glass! So I made a bunch of fun plates too! because... once your paint brush is in paint... why not??
So here is what you'll need: Glass plates (I get mine at either Ikea or the dollar store), glass or acrylic place settings - I order mine from here or just the inside glass of a dollar store frame. You could use champagne glasses, water goblets... the possibilities are endless! // Multi-surface acrylic paint (apple barrel, folk art, and Martha Stewart are all great multi surface options // different sized paint brushes - that's it!


So the steps are really easy! For the place setting and the plates... just paint different shapes and different swishes on the underside of the glass. For the place setting - you'll want to paint the name on the top portion of the glass, and for the plates you just have to remember to layer. So if you want the black dots or a different color to be "on top" you have to do those first. Let dry, and then add your next layer. Does that make sense?


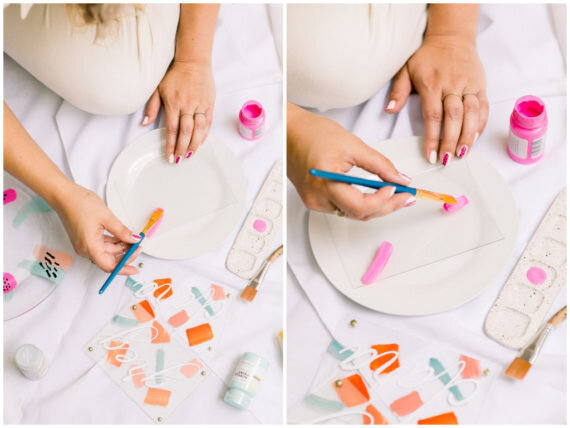
For some of the paints, you'll want the paint to look solid and not streaky - so it's important to not do too many layers right away. It's like painting your nails. You have to let the first coat dry before you add another layer and then it will look less translucent.

And just go for it! It's honestly such a fun and easy project. I tried not to think too much about my shapes and just let it flow. I liked the results better that way. I love that you guys noticed the place settings in the shoot and I hope you make your own! You can make a whole summer dining set to spruce up your backyard bbq or you can make all custom place settings for your micro wedding this Fall (because, duh, covid)


So if you end up doing the plates and you want to reuse and wash them - don't worry! First of all, the paint is on the underside so your food will never touch it. But if you want to wash and reuse a ton, simply let try for 24 hrs and then back at 350 for 30 min. It's super important to put the glass in the oven as it preheats so it can heat up gradually and not break. Also - once its done, leave it in the oven to fully cool down before removing.

I mean, how FUN did these plates turn out?! I was having so much fun with the bold colors and then I was like WAIT... I have to do a neutral one!!


There you have it! Super fun and easy tutorial to make colorful abstract art on basically any piece of glass - happy crafting!
p.s. if you loved this DIY - check out my other clear plate DIY HERE