Easy Paint Dot DIY
Sometimes I do DIY's and my friends comment cute things like "you're so creative!" or "I adore this!"
to which I reply... "thanks! you should make one/this!" and then crickets. Some people look at DIYs (mine or otherwise) all across the internet and think that it's cool but surely they wouldn't be able or aren't crafty enough to pull it off.
Well ladies and gent... or just more ladies (I highly doubt I have many men readers on here) this DIY is for EVERYONE from the super craft mom to the accountant who's main craft supply is her purple ballpoint pen... hey! It's PURPLE! To anyone in between... I promise you can do this project and it will be fun!

The perfect afternoon or after school project to just use your hands, get creative... maybe you just need to step away from the computer and give your eyes a break. OR maybe you're looking to add some custom art to your gallery wall - use these in your home or on your fridge... or turn them into a greeting card - whatever you do - this project will be finished in less than 10min and will cost you less than $10!

First up, here's what you'll need:
art paper - can be watercolor, cardstock, anything thick! You don't want to use plain ol computer paper for this one!
acrylic paints! You can use 3 colors or 5 - they are all about $.99-$3 at your local craft store. NO need to buy a gallon!
A credit card (although I recommend using an old gift card, starbucks card, gym card, etc.

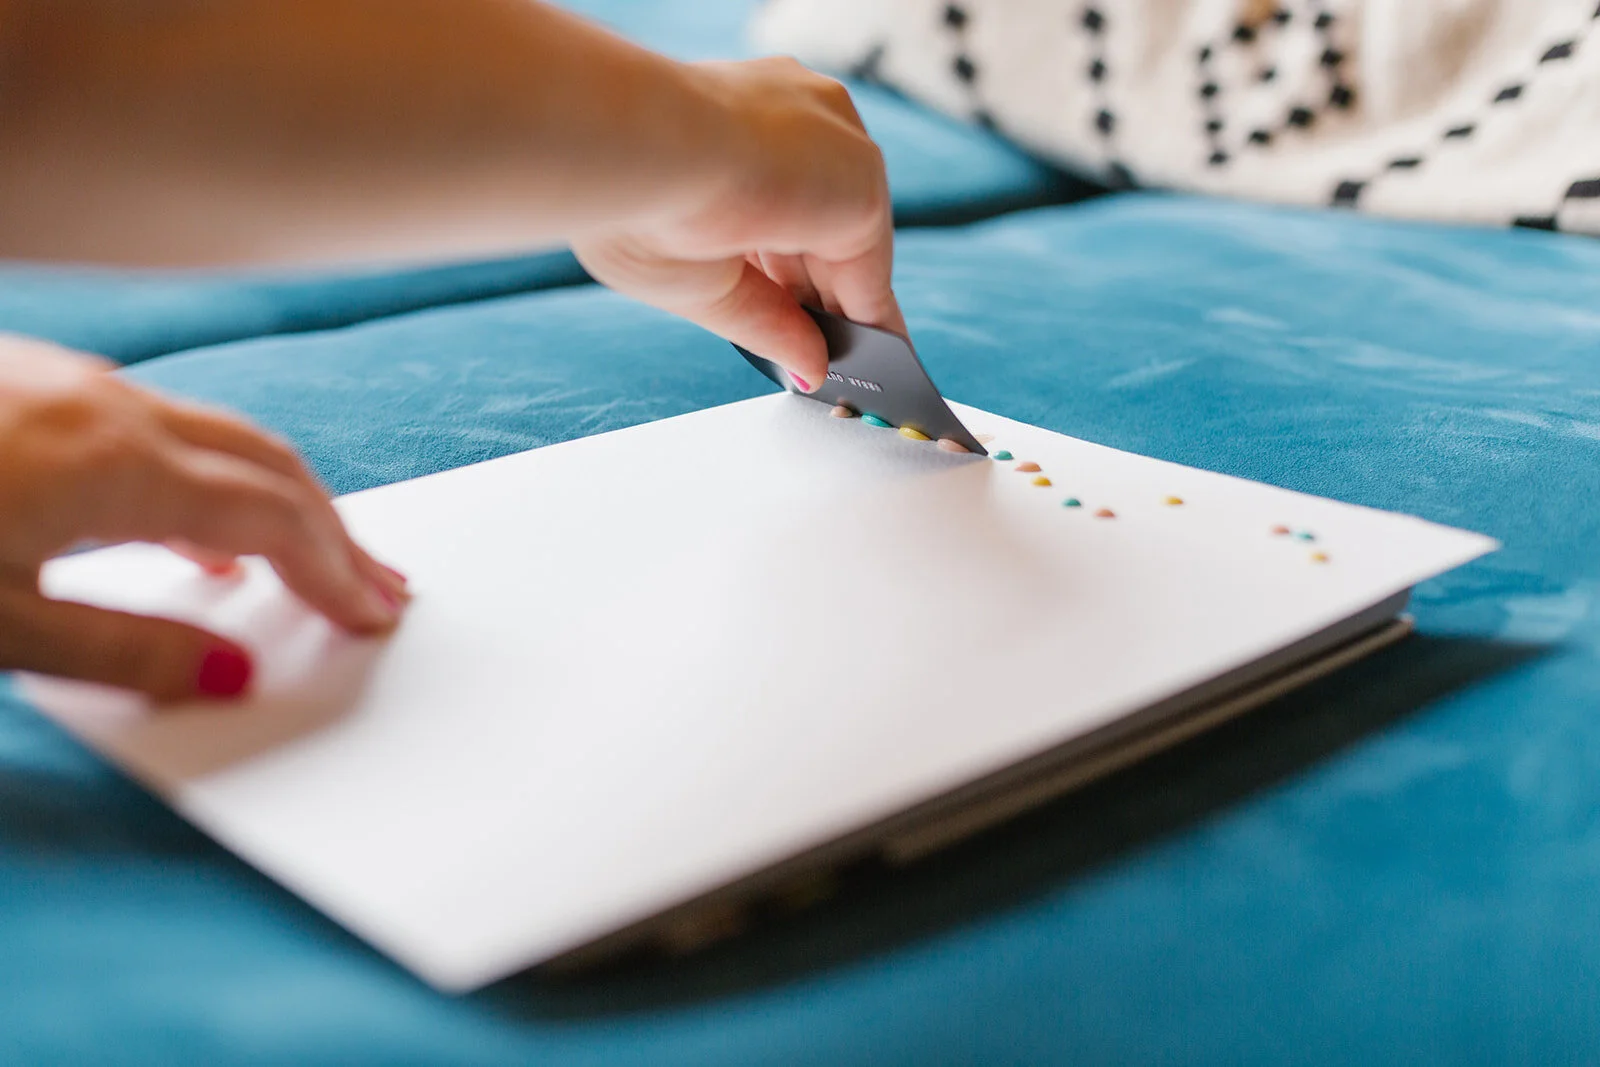
Step one - at the top of your page, drop dots of your paint in any sort of pattern you want. I did sizes about the size of those dot candy things that used to come on wax paper as a kid - remember those?! The bigger the dot - the wider your paint streak will be, so keep that in mind. Oh, and the further down the page it will go!

You want to get that first line pretty full! Then, pull out your card a almost in a "I'm squeegeeing my windshield" sort of motion just pull down at an angle bringing the paint down with you.

Once you've gone about as far as you can - pop up back up to the top and do it again. I didn't wipe the card in btween each round - but I'm sure you could.

and voila! instant art! I love how mine turned out. Would be so cute framed and hung up in a little girls room or any office don't you think??


Hope you enjoyed this fun and simple DIY! Now, put your phone down and create something today!
All photos by: Rachel Stelter Photography